
Gate of the Dead · player guide
Saltmarsh and Part Two
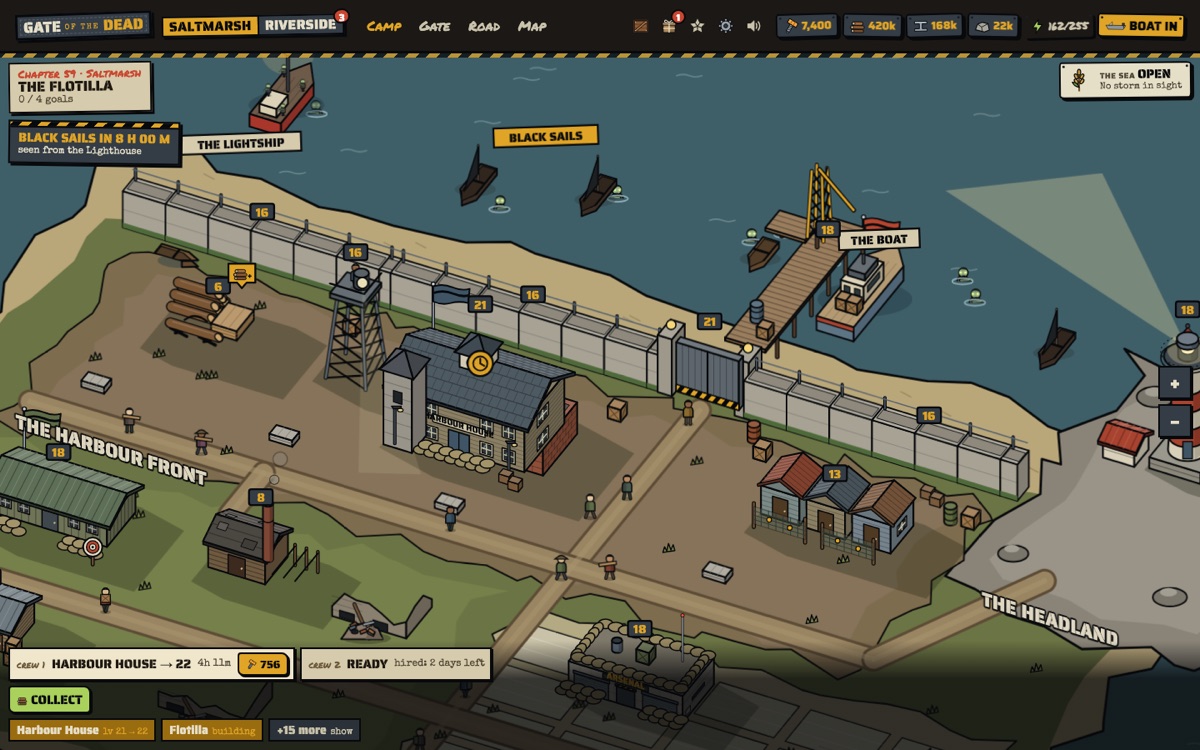
Part Two is chapters 31 to 60. The boat from chapter 30 lands at Saltmarsh, an island town up the coast, and you build a second camp from nothing while Riverside keeps going.
Two camps
- The switcher at the top of the camp moves you between Riverside and Saltmarsh. Each side shows what's waiting there.
- Each camp has its own buildings, stores, troops and crews. Saltmarsh starts with one crew; a second can be hired for Scrap Metal.
- Shared: the Mayor and energy, Scrap Metal, keys, leaders, speed-ups, the chapter and its goals.
- The Harbour House is Saltmarsh's Headquarters. Nothing there goes higher than it.
The boats
Saltmarsh has no scrap heap, so its steel comes across by boat. From chapter 33 the cargo boat carries timber, steel, food, troops and later ammo between the camps; a trip takes two to four hours each way, shorter with a longer Jetty. A second boat comes in chapter 40, and from chapter 52 the Harbour Market can run them on standing orders. The fishing fleet (chapter 36) brings fish for the Smokehouse, Saltmarsh's food.
Harbour nights
The Harbour Gate is in the sea wall, and the dead come out of the sea and up the beach. The drowned rise out of the water part-way down the field, and fire won't take on them while they're still in it. Each Harbour Gate level opens five harbour nights. The Lighthouse (chapter 37) shows what the next night brings and gives you the Beam, which holds everything still in the water for a few seconds. The three sea wall sections (chapter 38) are the harbour's Outer Wall.
- Low tide (chapter 57): a night started at low water has the sea right out, and the horde walks across the sands. It pays more Scrap Metal.
- Long nights (chapter 55): once a day, the last night held again with fifteen waves, in the dark.
The Sea Road and the island
The Sea Road (chapter 35) is fought like the Road, by boat, with your leaders and Saltmarsh's troops: ship troops over or train them in the Drill Shed. From chapter 41 squads go out on the island map from Saltmarsh: missions, an army base, wreck dives at low water, and the Old Fort on the south point, with its stone quarry and siege nights.
The end of Part Two
Chapter 59 builds the flotilla at the Jetty, twelve stages by its own crew. Chapter 60's crisis is the double night: Riverside's gate and the Harbour Gate attacked at once. You play one gate, the other is on auto, and SWITCH (or the S key) swaps them any time. Lose either gate and the night is lost. Hold both, and the flotilla sails with the Sea Road's squads to take the Lightship.
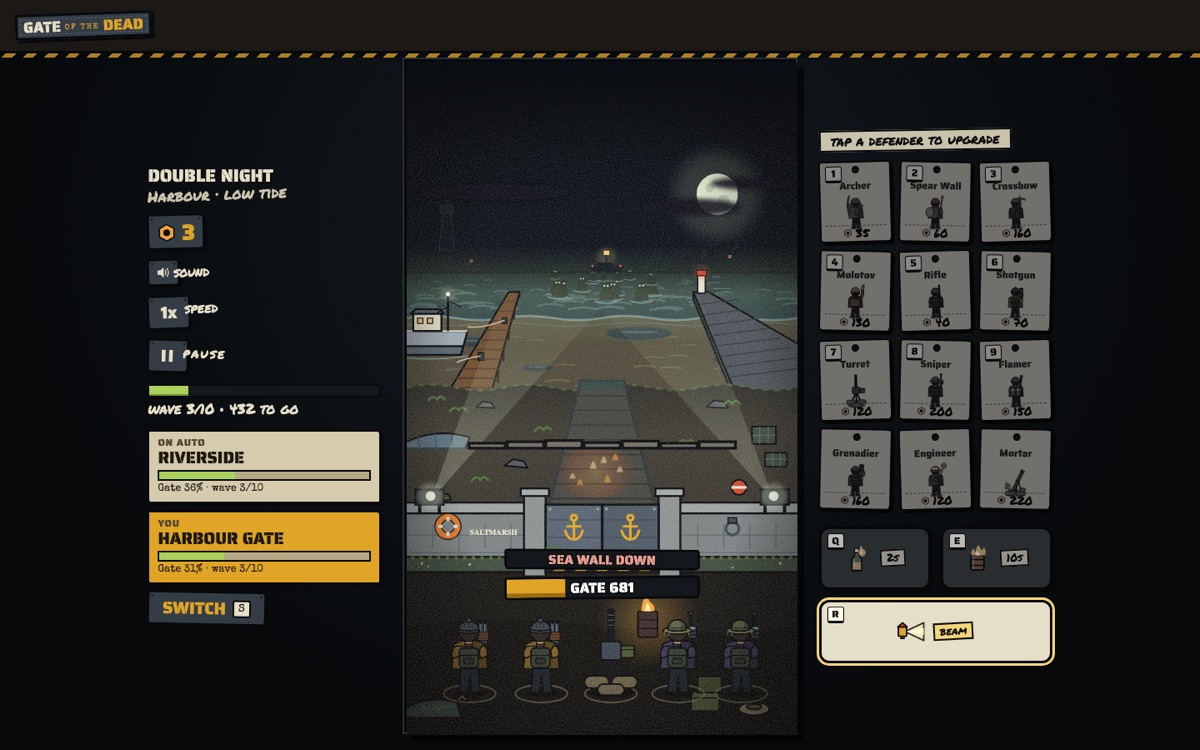
Tip: the gate on auto plays a little slower than you do. Start at the weaker gate (often Riverside, whose walls are as chapter 30 left them), and switch when the other card flashes.
Both camps keep going after chapter 60. Part Three is on its way.