
Gate of the Dead · player guide
Trading Post, School and Dock
Three buildings arrive in the second half of Part One, each with its own screen. The Trading Post fixes shortages, the School adds small bonuses that last for good, and the Dock sends boats out for food. All three stand in parts of town you'll have open by then.
The Trading Post
- Headquarters 12
- In the Market
- Chapter 15 asks for level 8
Swap timber, steel, food and water with the river traders. Open it from the building's sheet with Open the Trading Post.
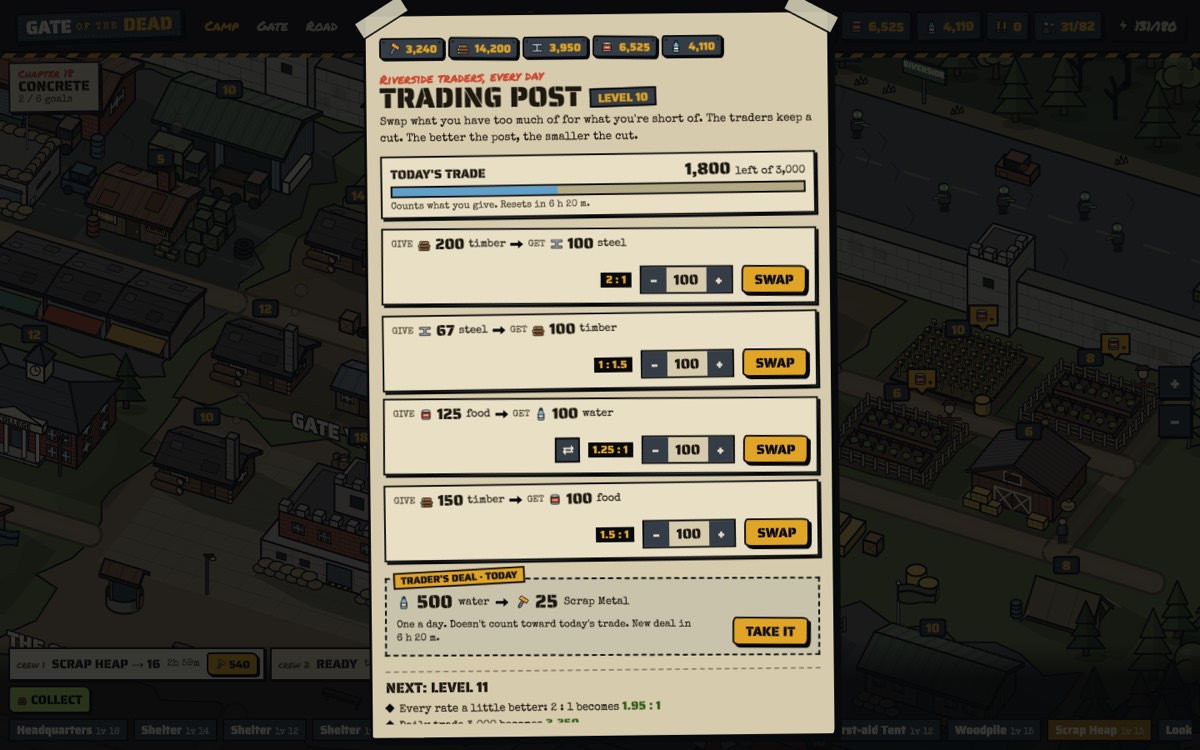
Swaps and rates
You can swap timber for steel, steel for timber, food for water, water for food, and timber for food. The rate improves with every level: timber for steel starts at 3 to 1, reaches 2 to 1 at level 10 and 1.5 to 1 at level 20. A swap and its reverse never let you make anything on a round trip, and food or water you get can't go past the camp's store.
The daily limit
The traders take only so much in a day: 750 materials at level 1, plus 250 for each level after (5,000 at level 18). The limit counts what you give, and starts again each day.
The trader's deal
Once a day there's a single deal outside the limit. It changes daily and might be food for Field Manuals, timber for a Leader Key, steel for ammo, water for Scrap Metal, timber for an hour's speed-up, or food for a new survivor. Deals you can't use yet (a key without the Leaders' Hall, ammo without the Bullet Farm) are skipped.
Tip: most camps end up with spare timber and too little steel. Swapping the overflow at the end of each day is the Trading Post's best use.
The School
- Headquarters 13
- On Clinic Hill
- Chapter 16 asks for level 10
Six lessons, each giving a small bonus that lasts for good. You study one lesson at a time, and no lesson can go higher than the School itself.
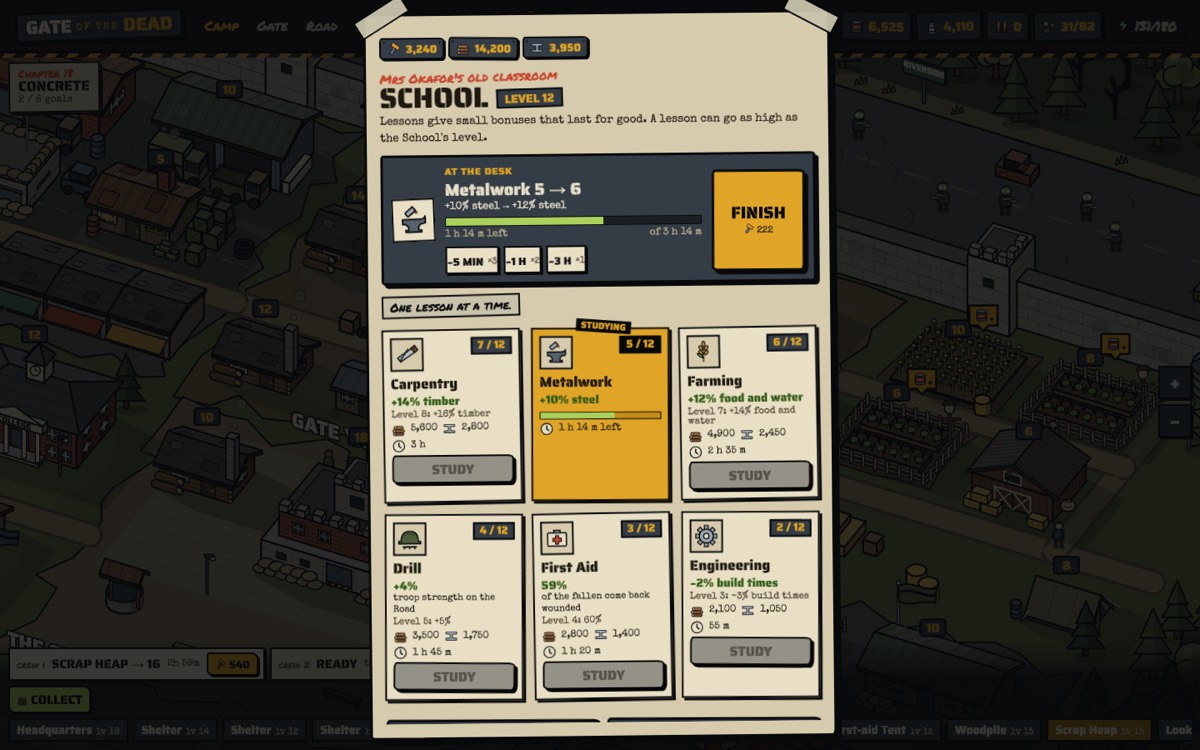
| Lesson | Each level gives |
|---|---|
| Carpentry | +2% timber |
| Metalwork | +2% steel |
| Farming | +2% food and water |
| Drill | +1% troop strength on the Road |
| First Aid | +1% more of the fallen on the Road come back wounded |
| Engineering | 1% off build times |
Lessons cost timber and steel (700 timber and 350 steel per level of the lesson) and take time: five minutes for level 1, close to four hours for level 10. A lesson runs on its own timer, not a building crew, so it never holds up your builds. You can finish one early the same ways as a build: free in the last five minutes, with a token, or with Scrap Metal.
Tip: Engineering and Metalwork pay back the most for most camps; Drill and First Aid matter once you're pushing the Road hard.
The Dock
- Headquarters 18
- On the River Bank
- Chapter 20 asks for level 10
Fishing boats on the river. Send a moored boat out for 1, 4 or 8 hours; it comes back with food and sometimes a find. Each trip costs 2 energy.
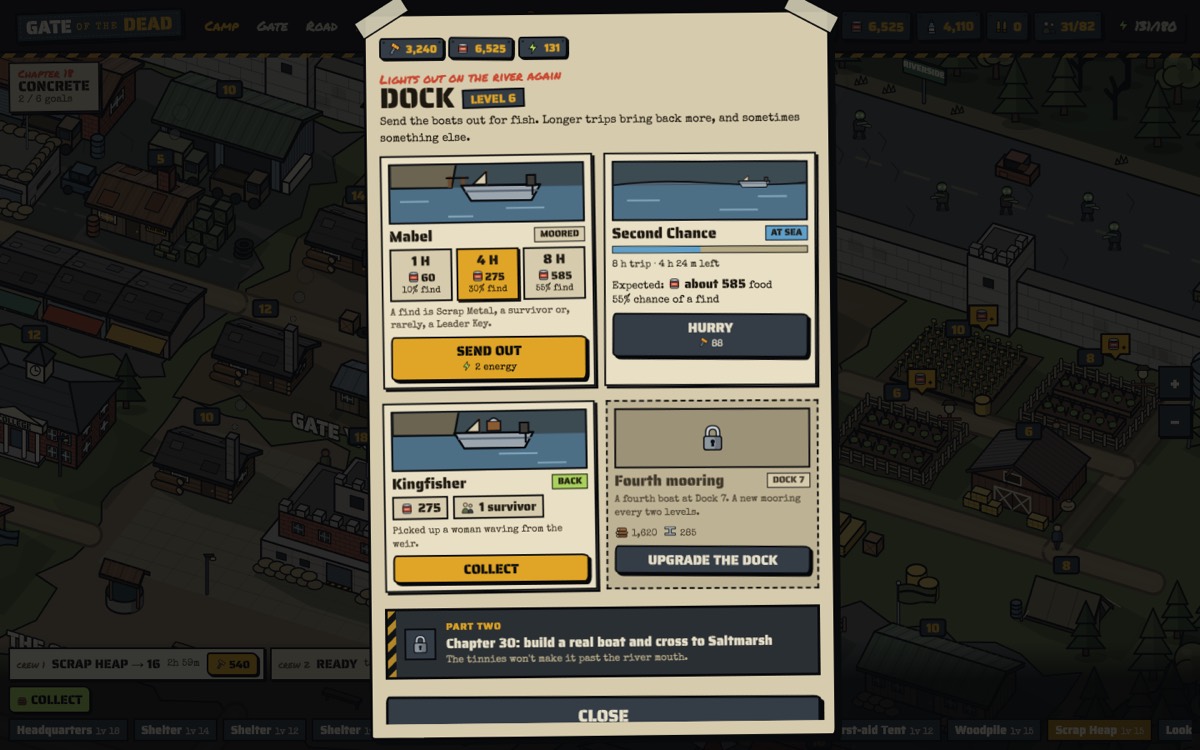
- Moorings: one boat at Dock 1, then another every two levels.
- The catch follows your Headquarters' food rate and the Dock's level. Longer trips catch a little more for each hour away.
- Finds: about one trip in ten for an hour, three in ten for four hours and more than half of eight-hour trips bring back something extra: Scrap Metal, a survivor, or rarely a Leader Key.
- Hurrying a boat home costs one Scrap Metal for every three minutes left, and is free in the last five.
- Food that won't fit in the store when the boat lands spoils, so collect before you send a long trip.
Tip: send eight-hour trips overnight and one-hour trips while you're playing.