
Gate of the Dead · player guide
Every building
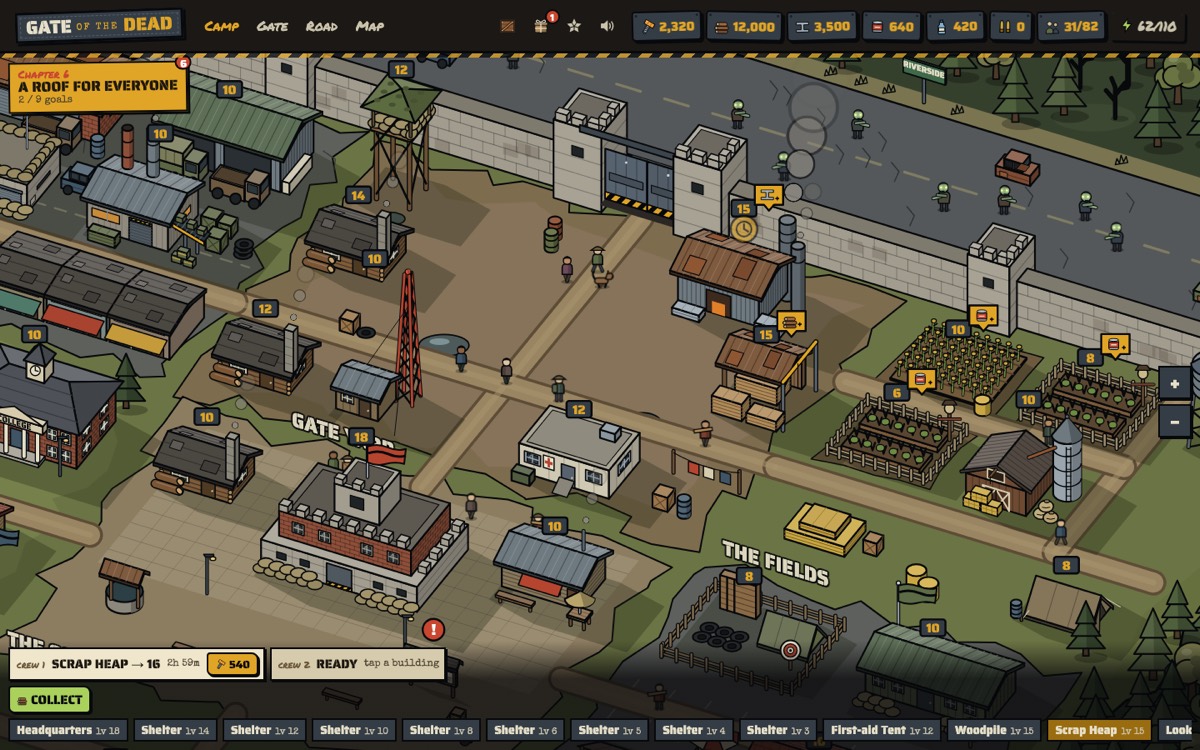
Every building in the camp, in roughly the order you meet them. Each entry says what the building does, the Headquarters level it needs, and anything worth knowing.
Two rules apply to all of them: no building can go higher than the Headquarters, and a building's plot has to be in a part of town that's open (see The camp). Levels go up to 30.
- Headquarters
- Gate
- Shelters
- First-aid Tent
- Woodpile
- Scrap Heap
- Lookout
- Bike Rack
- Canteen
- Veg Patches
- Rain Barrels
- Training Yard
- Archery Range
- Watch House
- Radio
- Leaders' Hall
- Barn
- Armoury
- Bullet Farm
- Trading Post
- School
- Dock
- The Outer Wall
Headquarters
- Opens at the start
- Campfire, Depot, Town Hall, Stronghold, Citadel
The heart of the camp. No other building can go higher than the Headquarters, and it opens new plots and buildings as it grows. Each level needs a number of survivors in camp (3 for level 2, rising to 120 for level 20).
Tip: when you are short of survivors for the next level, play gate nights you haven't held yet and push the Road; both bring people in.
Gate
- Headquarters 1
- Opens Defend the Gate
The gate in the wall. Defend the Gate opens once it is built, and every level makes it tougher on the nights. It starts as a pallet barricade and hardens as it climbs. Several chapters ask for a Gate level, so it is rarely wasted.
Tip: if a night keeps beating you, a Gate upgrade is often a surer fix than another try.
Shelters
- Headquarters 1, 2, 7, 14 and 19
- Eight in all
Beds. Survivors without a bed can't work. Each shelter holds two people plus its level, on top of the four beds you start with. They begin as lean-tos and become tents, cabins, houses and brick houses.
Tip: housing goals count only survivors with a bed. Shelters are cheap and quick, so keep them a step ahead.
First-aid Tent
- Headquarters 1
Patches people up. On the Road, a share of the troops who fall are only wounded and come back from here: about 20% with a basic tent, plus 3% a level (up to 70%). Troops hurt on a close-run map mission rest here too, for an hour without a tent and less as it grows. It also makes the night's Last Stand cheaper, and from level 5 your first Last Stand each day is free.
Woodpile
- Headquarters 1
- Timber every hour
Timber every hour, even while you are away. It holds eight hours' worth, then stops, so collect it. Output climbs quickly with level. It grows into a sawmill and then a lumber yard.
Scrap Heap
- Headquarters 1
- Steel every hour
Steel every hour, also holding eight hours' worth. Steel is scarcer than timber (the yard makes about a quarter as much), and from level 3 every building wants some, so keep this one level with the Woodpile.
Lookout
- Headquarters 2
Eyes on the road. It makes the wall stronger on the nights. Chapter 3 and chapter 5 both ask for it.
Bike Rack
- Headquarters 2
- Opens the Road
Bikes for the Road. The Road opens once it is built, and every level adds to your squad's strength there. On the map it decides how many squads you can send at once (two, then three at level 5, four at 10 and five at 20) and how much of the map is out of the fog: the Motorway at level 3, the Shopping Centre at 5, St Jude's at 8, the Stadium at 12 and the Harbour at 16.
Canteen
- Headquarters 3
- In the Square
Hot stew: the Mayor's biggest meal, 30 energy for 40 food and 20 water, up to three a day. Beans and bottled water work without it but give far less. See The Mayor and energy.
Veg Patches
- Headquarters 4 and 6
- Three in all
Food every hour. How fast food comes in and how much the camp can store follow the Headquarters level; each Veg Patch level adds 3% on top. Food feeds the Mayor and pays for training troops, which uses a lot of it.
Rain Barrels
- Headquarters 4
Water every hour, working the same way as the Veg Patches: the rate and store follow the Headquarters, and each level adds 3%. Water is mostly for meals.
Training Yard
- Headquarters 4
- In the Market
Trains the melee line for the Road, starting with Spear Rookies. Each level holds ten more troops and, at set levels, opens the next tier. See Troops and training.
Archery Range
- Headquarters 5
- In the Market
Trains the ranged line, starting with Bow Rookies. Like the Training Yard it holds ten more troops a level, and later tiers (riflemen and up) also need the Armoury and the Bullet Farm.
Watch House
- Headquarters 1
- Permanent defender upgrades
Trains the crew on the wall. Upgrades bought here last for good, so every defender starts each night stronger. Defenders can be upgraded one level past the Watch House's own level, up to level 10. Upgrades cost Scrap Metal and steel.
Radio
- Headquarters 7
- Haines on the radio
The same idea as the Watch House, for abilities: grenade, airstrike, molotov, flare and mines can be upgraded one level past the Radio, up to level 5. Chapters 7 and 10 ask for it.
Leaders' Hall
- Headquarters 7
- On Clinic Hill
Recruits leaders with Leader Keys and Gold Keys. It opens with 5 Leader Keys and 2 Gold Keys to spend. See Leaders.
Barn
- Headquarters 6
- In the Fields
Stores food: each level lets the camp hold 6% more. Worth it once training troops starts eating through your food, and chapter 8 asks for Barn 4.
Armoury
- Headquarters 10
- On Workshop Row
Makes guns and heavier gear. Riot Guards and above on the melee line need it, and with the Bullet Farm it lets the Archery Range train riflemen.
Bullet Farm
- Headquarters 11
- On Workshop Row
Makes ammo for soldiers with guns. Like food and water, its rate and store follow the Headquarters; each level adds 3%. Gun troops need ammo to train, and a Road stage uses one round for every four gun troops.
Trading Post
- Headquarters 12
- In the Market
Swap timber, steel, food and water with the river traders, up to a daily limit. Every level gives a better rate, and there is one trader's deal a day. Full details in Trading Post, School and Dock.
School
- Headquarters 13
- On Clinic Hill
Six lessons that give small bonuses for good: more timber, steel and food, stronger troops, more of the fallen saved and quicker builds. One lesson at a time, and none higher than the School.
Dock
- Headquarters 18
- On the River Bank
Fishing boats on the river. Send them out for 1, 4 or 8 hours for food, and sometimes a find. A new mooring every two levels.
The Outer Wall
- Headquarters 18
- Four sections around the town
A second ring of wall around the grown town, built in four sections: North Road, East Fields, South Market and River Bank. Each section is raised on its own, and every level adds to the wall's strength. In story and crisis nights the horde has to break the Outer Wall before it can reach the gate, and it is rebuilt free after every night. Chapter 18 asks for all four sections at level 3. See Defending the gate.